
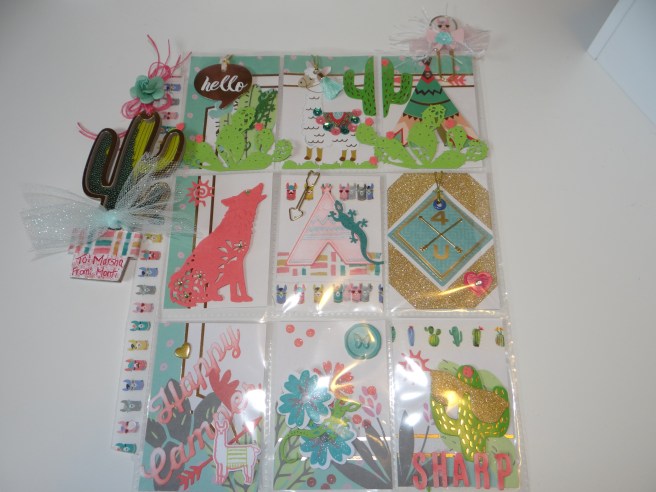
HAD A LOT OF FUN MAKING THIS POCKET LETTER FOR THE APRIL SWAP. I USED LOTS OF DIES FROM SPELLBINDERS LIKE THE CACTUS, COYOTE, TENT AND LIZZARD. I ALSO USED A CUTE LITTLE LLAMA STAMP AND DIE SET FROM RECOLLECTIONS.


HAD A LOT OF FUN MAKING THIS POCKET LETTER FOR THE APRIL SWAP. I USED LOTS OF DIES FROM SPELLBINDERS LIKE THE CACTUS, COYOTE, TENT AND LIZZARD. I ALSO USED A CUTE LITTLE LLAMA STAMP AND DIE SET FROM RECOLLECTIONS.

THIS IS THE 2ND CARD I MADE USING THE #HEROARTS #MYMONTHLYHERO CARD KIT. I STAMPED AND DIE CUT THE IMAGES FROM THE STAMP AND DIE KIT INCLUDED IN THE KIT AND THEN LAYERED THEM BEHIND SOME LAYERS OF HILLS AND GRASS. IN THE BACKGROUND I USED A STENCIL NOT INCLUDED IN THE KIT TO ADD A LITTLE INTEREST. I STAMPED THE GREETING FROM THE CARD KIT IN BLACK INK. I FRAMED THE CARD WITH A PIECE OF PINK CARD STOCK AND THEN MOUNTED IT ON A WHITE CARD BASE THE A2 SIZE SIDE FOLDING.

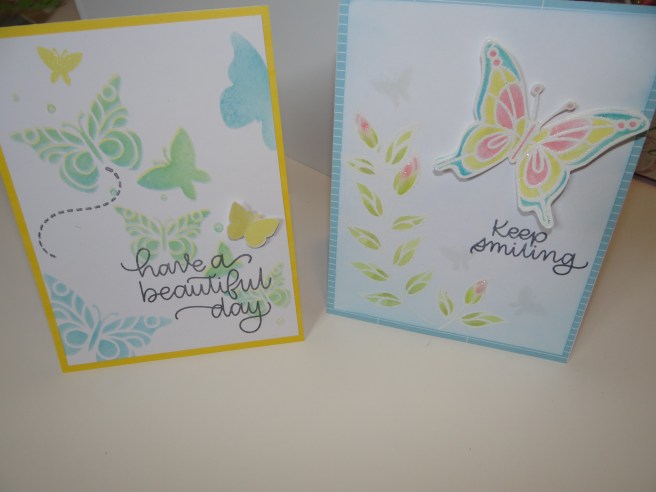
My first card I used the stencil included in the kit to add butterflies to my white base piece. I used the New Tim Holtz Distress Oxide Inks Squeezed lemonade and Mermaid Lagoon that were also included in the kit. Once I applied one color I shifted my stencil a bit to give a kind of shadowy effect and made some of the butterflies green by combining the blue and the yellow inks. I stamped the butterfly trail and the greeting from the stamp set in black ink. I stamped a solid butterfly from the stamp set and then fussy cut it out and adhered it to the card. I mounted the white base onto a yellow 5.5 by 4.25 top fold card base. The card was finished off with some clear Nuvo drops, I applied the drops on top of the little dots of the stamp so they took on the color of the ink.
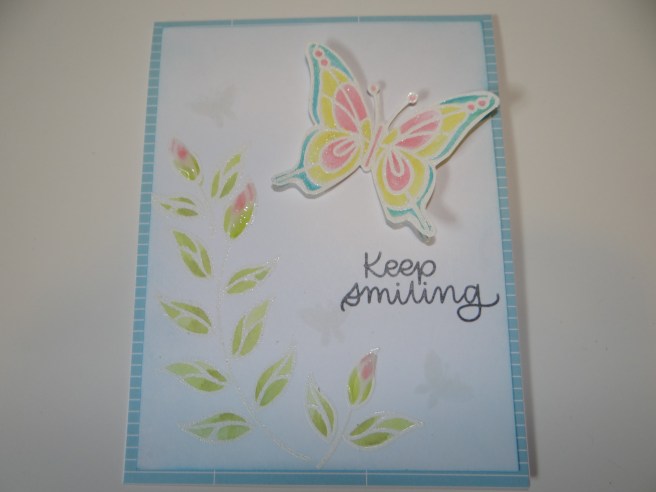
The second card I stamped with white embossing powder and then colored the images with my water brush and Tim Holtz distress oxide inks. I stamped the butterfly twice and cut out the second one and applied it over the top of the first with some dimensional tape. I stamped a couple solide butterflies with some versamark ink just for light inages in the background. I stamped a greeting from the set in black and then added the whole white panel to a piece of the patterned paper included in the kit and affixed the whole thing to a top folding 5.5 by 4.25 card base. I finished the card off by adding some clear Nuvo drops to the buds on the leaves for some shine.

This last card I started out applying some texture paste to the butterfly stencil and then cut a strip and added on top of the two layered doilies. I used another piece of the patterned paper from the kit to cut a label to add my sentiment on to with purple ink. I also added a turquoise felt flower to the butterfly strip and then added more clear Nuvo crystal drops. The whole piece is added on to a piece of purple striped patterned paper from the kit and added to my card base, which again is a top folding 5.5 by 4.25.
Hope you like these, I had a blast making these using different techniques. If you have any questions or comments leave them in the comments section. Have a great day.

Front cover of the flip book, it was thick so I wrapped bakers twine around for the closure. The base for my book is a card stock CD case. I added lots of die cuts, a wood photo frame, flowers, and gems and doilies.

I used the Welcome Spring paper collection from American Crafts.

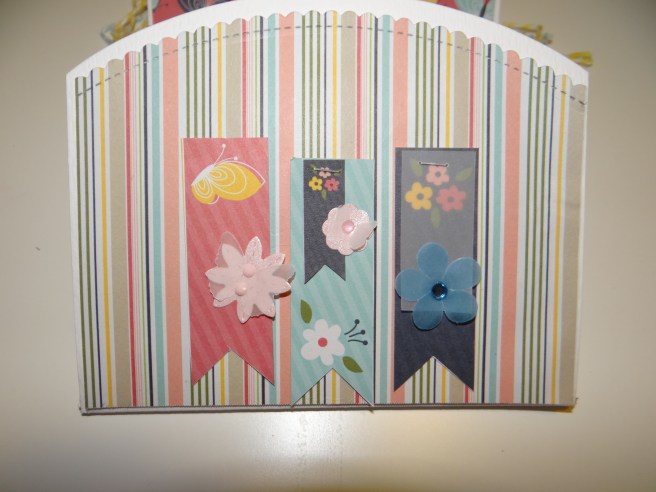
Opening the top flap. I have a doily and then a wood arrow I colored with my Copic markers and then added flowers and bling to it. Three flags from the paper collection are affixed on the bottom flap with a few tiny flowers added on top.
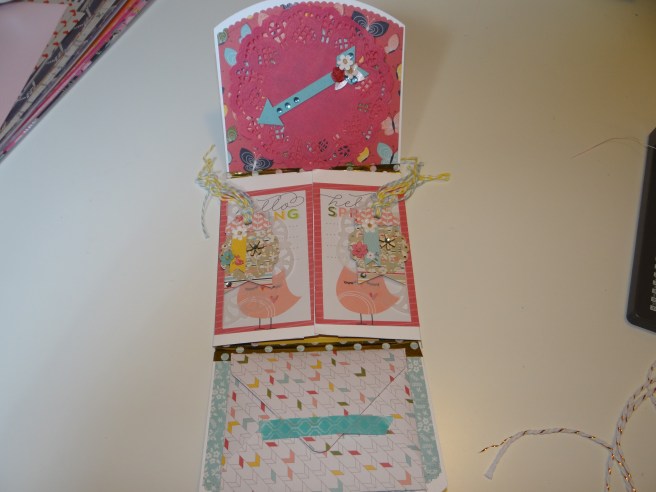
Bottom and top flap opened to show the two small flaps that open to the sides. Each side id covered with a piece of patterned paper and then I added a vellum doily on top of that. Then I created two matching tags to layer on each side. The tags have twinewith tied on top and are layered with flowers, small doilies and bling. The bottom flap has an envelope I made to put some goodies inside for the recipient and then taped closed with some washi tape.

A close up of the tags.

The other bottom flap has a die cut swan on it and then the other flap has another cute envelope I made using the paper collection that houses more goodies. I have washi tape on all the seams even though this one was piece of paper to begin with so I didn’t need it to hold the flaps together, it was just for decoration.

The inside base has a paper piece from the collection that I added some embellishments to. The inside of each of the side flaps I covered with some patterned paper and scalloped the edges and then layered some ribbon and paper pieces from the collection and stapled on wiith my mini stapler from Tim Holtz. I finished them off with a wood piece.

The next top flap has a piece from the collection that I taped down on the sides and then cut a little piece down the middle and folded back so you can reach in and get the note out to read. I used turquoise mini glittered letters to spell the word note. The top of that page has a vellum envelope I created with my We R Memory Keepers envelope punch board. I added some embellishments inside and then put a small die cut bow for the closure. I adhered that with a paper clip banner that I made.
A close look at he bottom front flap.
A fun project to make that you can customize for any occasion.
